
VoIP Business-Telephony and Voicemail
How to configure a SIP Phone Device?
- VoIP Business lets you connect your third-party IP phones to make or receive calls.
- Our dedicated VoIP software can be used with a wide range of SIP devices.
- It’s important to note that Admins and users have separate SIP configurations and can add/remove device connections independently.
- Also, a user can connect VoIP Business with multiple mobiles, desktops, and web extensions.
- These step-wise instructions will teach you how to configure a SIP phone device to VoIP Business.
Follow these instructions:
First, you need the IP address of your SIP phone to connect from your VoIP Business account.
- Sign in to your VoIP Business account and click the bottom-left ‘Settings’ icon.
- Access ‘Phone’ in settings.
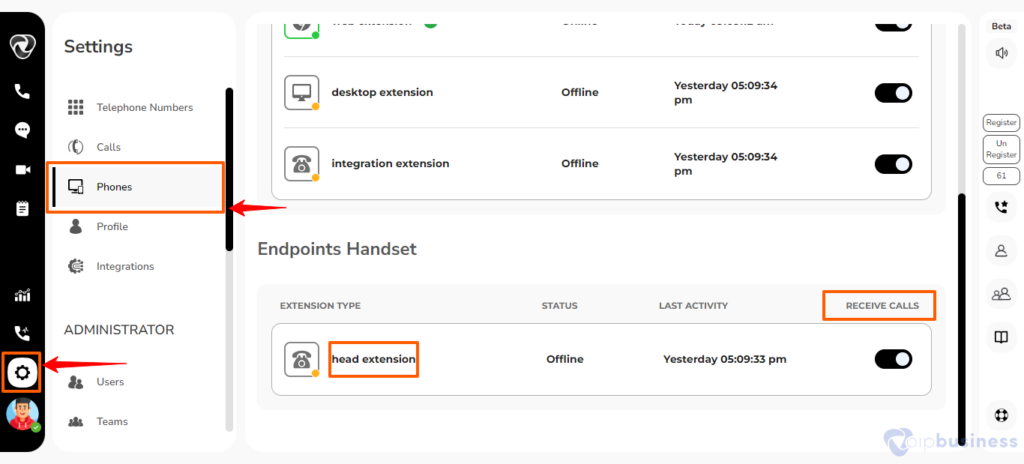
- Click Phone and scroll down to the Head extension details.
- Toggle the ‘Receive Calls’ button for this extension.
- You will find the SIP Username and Password. Copy the credentials.
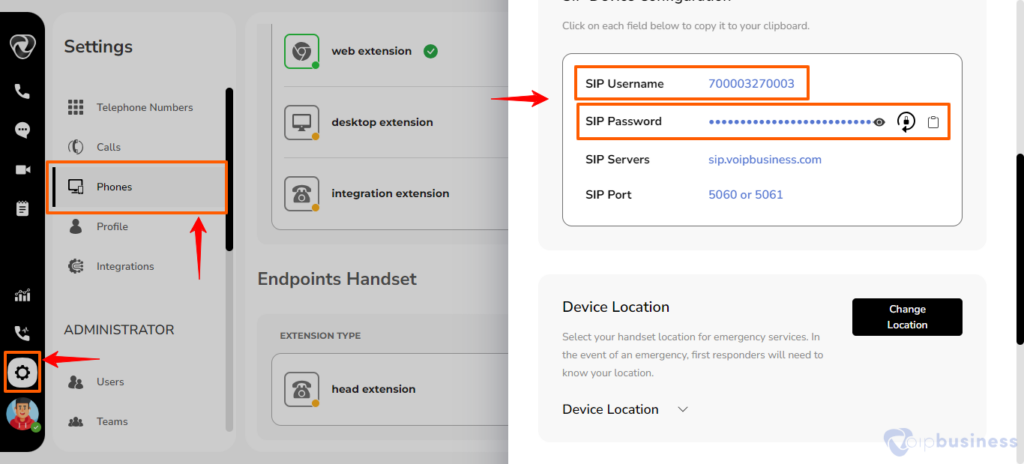
- Open a web browser and paste the SIP IP address.

- A new interface will appear on your screen.
- You’ll see a SIP login webpage.
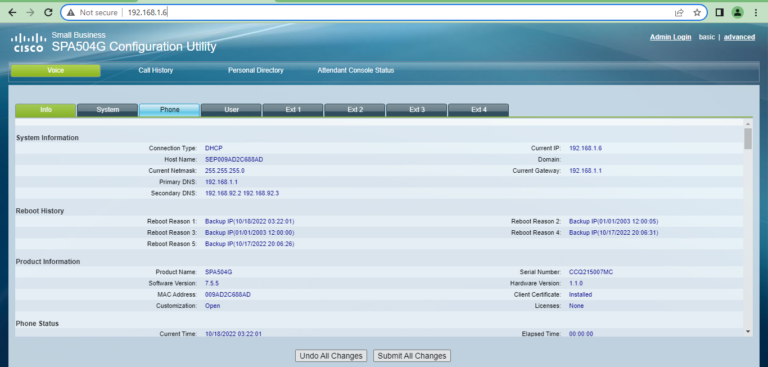
- Find ‘Admin login’ at the top-right corner and click on it.
- Then, just click ‘Ext 1’ on the new interface.
- Scroll down, paste the copied credentials in the ‘Subscriber Information’ section.
- Now, select ‘Phone’ and add a ‘Short name’ in the desired line key for your SIP.
- Finally, hit ‘Submit all Changes’.
Call Forwarding:
- Call Forwarding is a popular VoIP Business feature that transfers your calls to an alternative number for some reasons.
- The user can be busy at one instance or is not available by phone.
- Thus, this feature is beneficial for businesses and individuals.
- It cuts costs and improves work efficiency by getting calls at the right time.
Set call routing for User:
- Start by signing in to your VoIP Business Account.
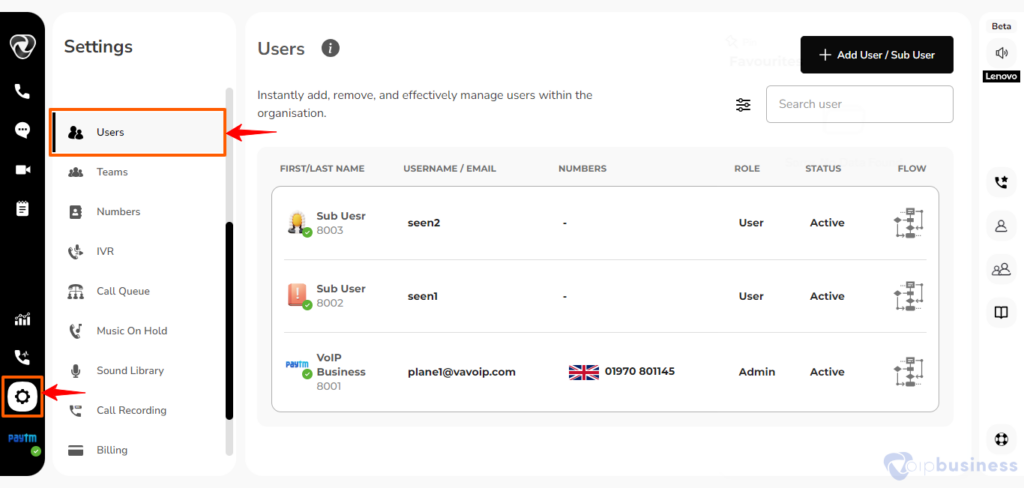
- Navigate to ‘Users’ under ‘Administrator’ settings in the ‘Settings’ menu.
- Choose the user for call forwarding and click on their profile.
- A new pop-up window will appear on the right.
- In the user edit window, scroll down to the ‘Calls’ section and Click the ‘Change’ button.
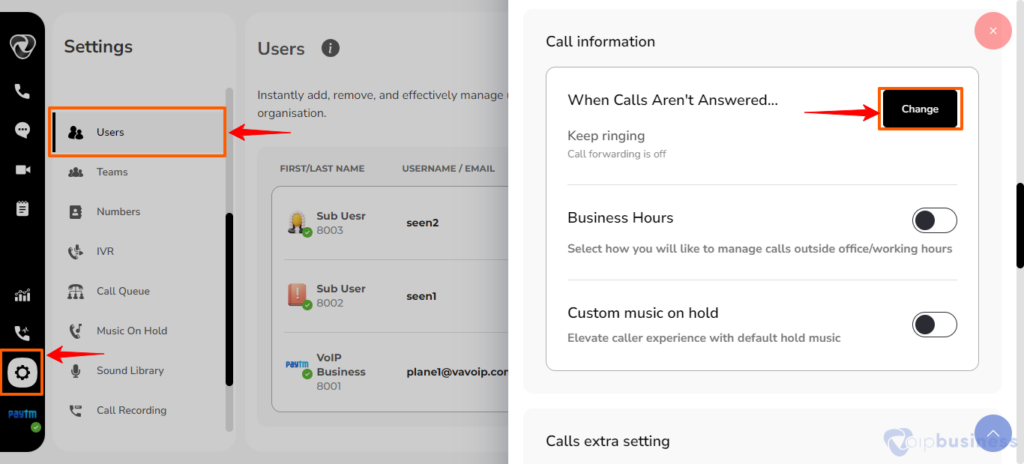
- A call forwarding settings pop-up will be displayed.
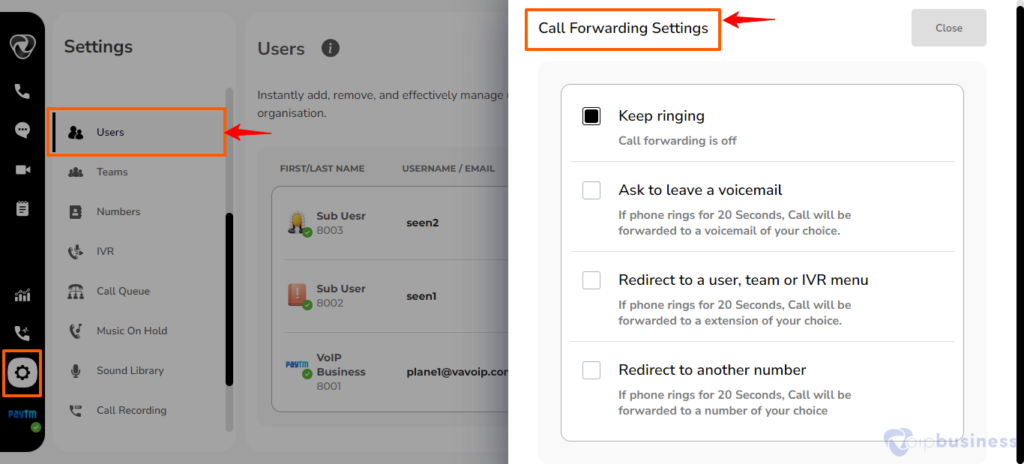
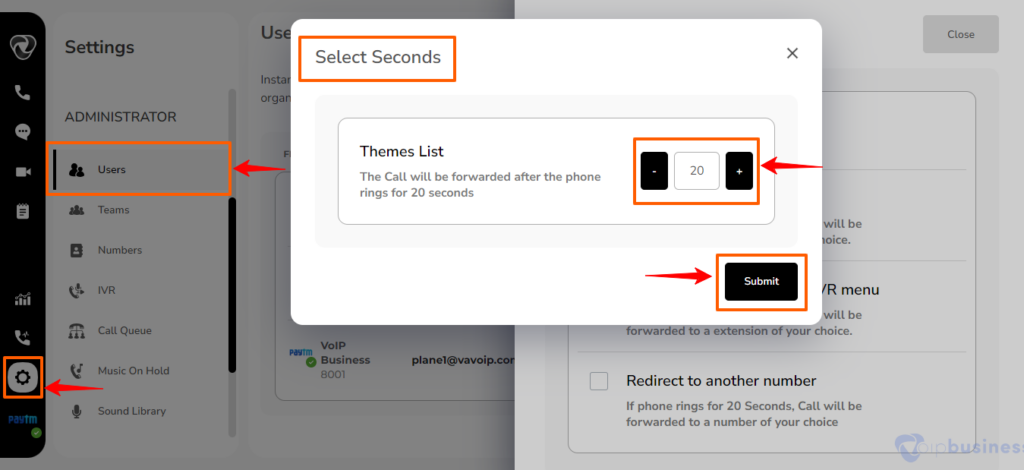
Select the call forwarding option:
- Keep ringing.
- Ask to leave a voicemail.
- Redirect to a user, team, or IVR menu.
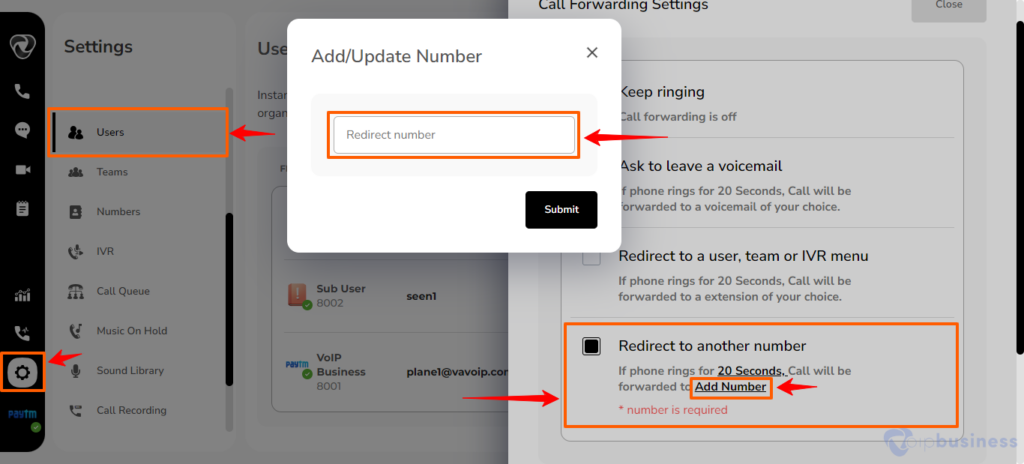
- Redirect to another number.
Click “Redirect to another number” to transfer your calls to that number. Add the number in international format 🡪 Submit.
Similarly, click “redirect to a user, team, IVR menu” to forward your calls. 🡪 Select the option you want 🡪 Close.

You can redirect your calls to the call queue, team, user, and IVR through this process.
Sub-users can also set their call routing using the same navigation.
Voicmail
- Voicemail is a substitute for emails or calls. VoIP Business voicemail feature sends, receives, and stores voicemail in the voicemail box.
- In case of no response from the receiver, callers can send voicemails.
- Also, the receiver can retrieve the recorded message later.
- Similarly, you can set your number to voicemail if you aren’t available or can’t attend calls.
- It is pertinent to note that you can only set voicemails to your numbers.important
Follow these steps to assign voicemail on your number when calls go unanswered:
- Start by signing in to your VoIP Business Account.
- Navigate to ‘Users’ under ‘Administrator’ settings in the ‘Settings’ menu.
- Choose the user for call forwarding and click on their profile.
- A new pop-up window will appear on the right.
- In the user edit window, scroll down to the ‘Calls’ section and Click the ‘Change’ button.
- A call forwarding settings popup will appear. Select the second option.
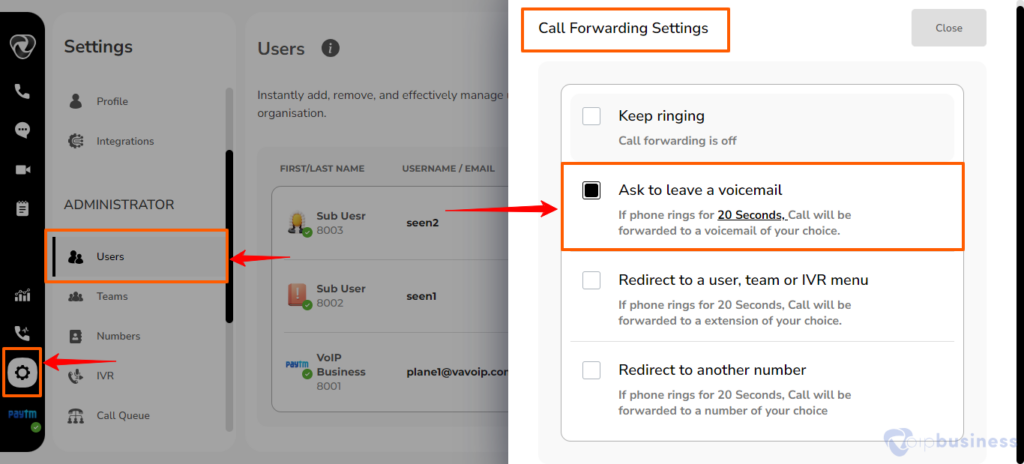
- You can also adjust your ring time.
How to enable a voicemail pin?
To change your Voicemail PIN, follow these steps:
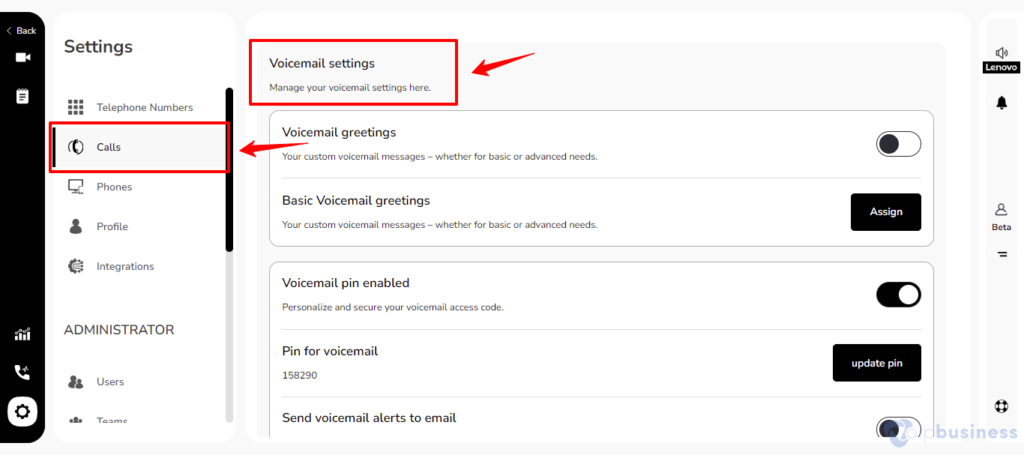
- Sign in to your VoIP Business Account, click Settings on left-bottom sidebar, and navigate to the Calls and click on it.
- Scroll down to locate ‘Voicemail PIN Enabled’ in the voicemail settings.
- Turn on Voicemail PIN, set a six-digit code.
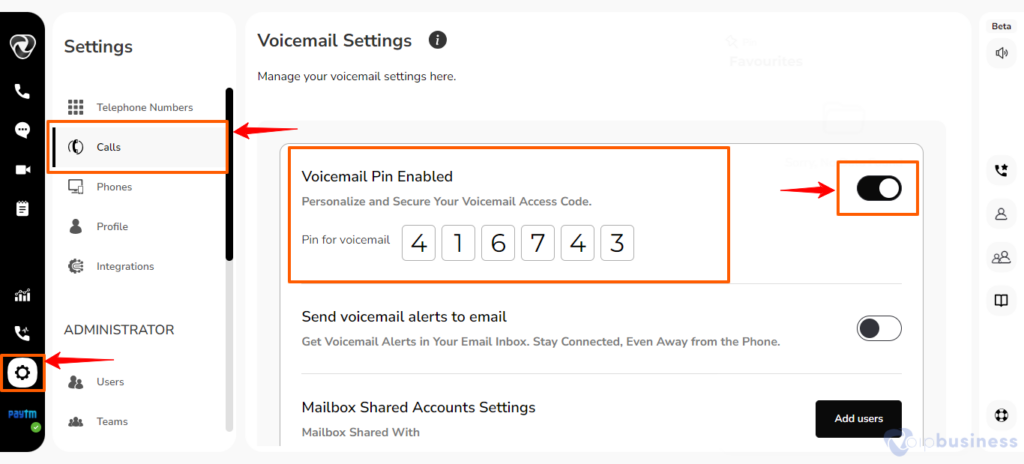
- In VoIP Business, both admin and sub-users create their own Voicemail PIN codes.
How to send voicemail alerts to your email?
In VoIP Business, users can also forward voicemails to their email.
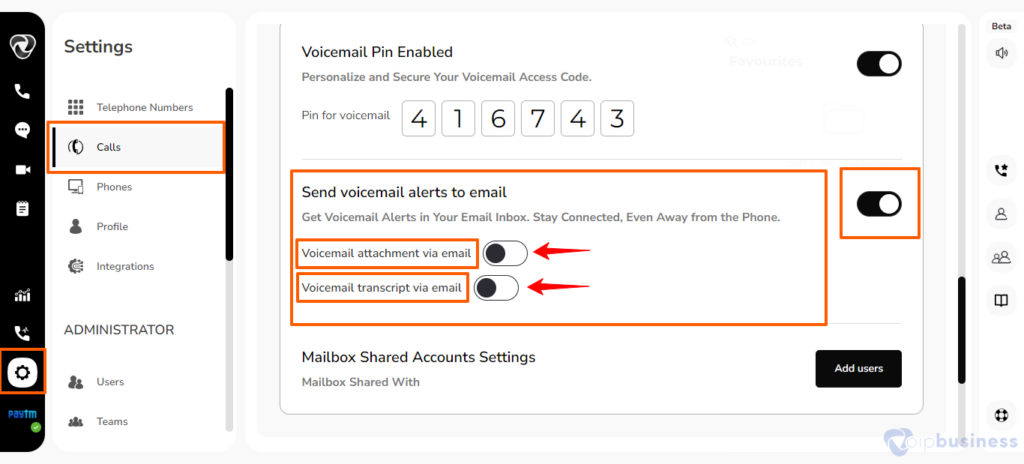
There are two types of alerts via email:
- Voicemail attachment via email.
- Voicemail transcript via email.
To enable voicemail alerts to your email. Follow these steps:
- Log in to your VoIP Business Account and go to ‘Settings’ in the left sidebar.
- Locate and click on ‘Calls’ from settings.
- Scroll down to ‘Voicemail Settings’ and enable ‘Send voicemail alerts to email’.
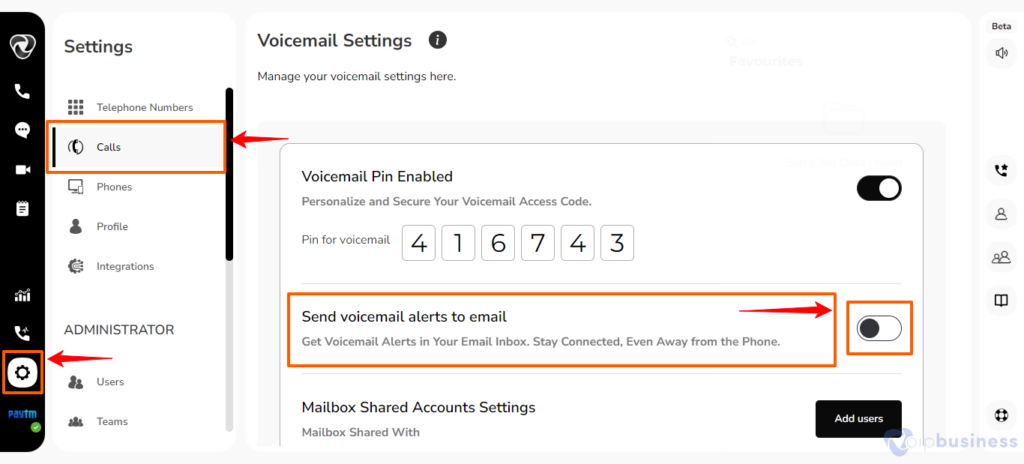
- You’ll have two options there. Toggle one according to your need.
How to share my voicemails with other users?
- Users have the capability to share their mailbox with other users within a VoIP Business Account.
- For seamless communication, VoIP Business enables voicemail sharing among users.
Follow these steps:
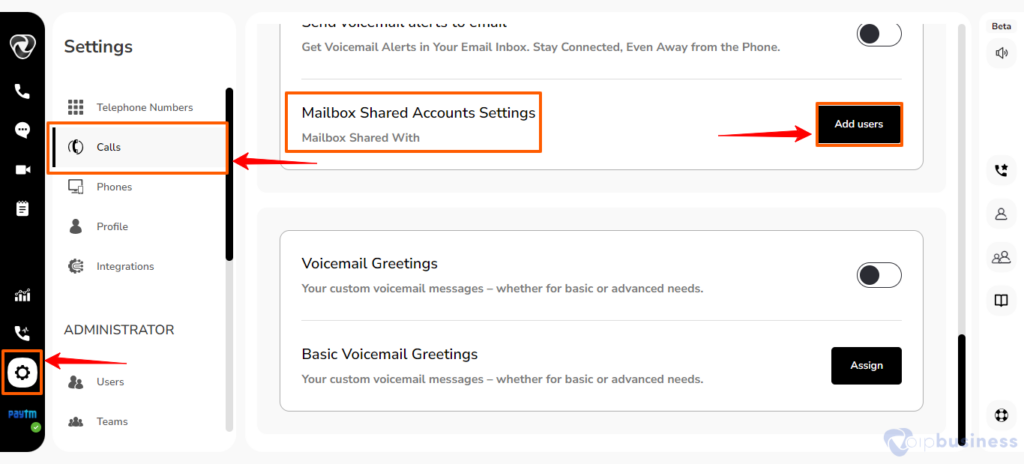
- Log in to your VoIP Business Account and go to ‘Settings’ in the left sidebar.
- Locate and click on ‘Calls’ from settings.
- Scroll down to ‘Voicemail Settings’ and Click the ‘Add Users’ button as shown below..
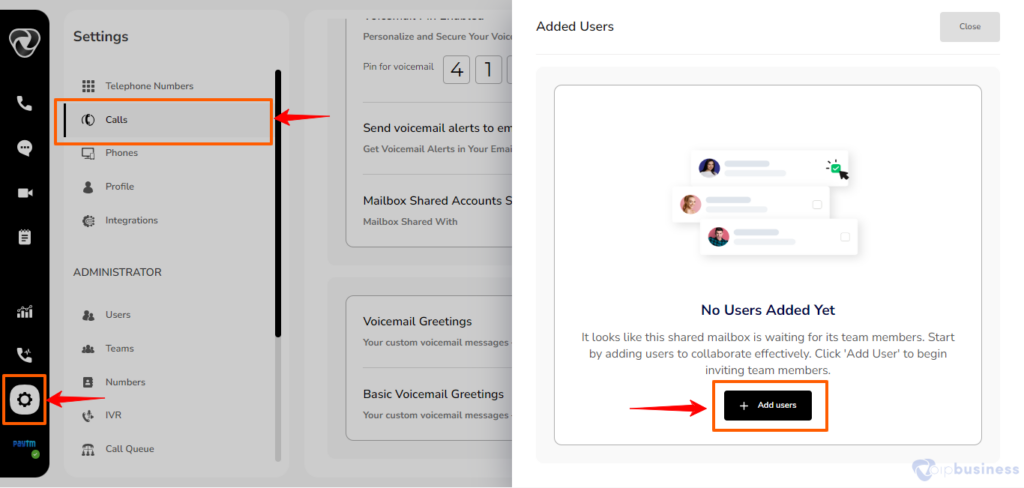
- A new pop-up window will appear, click ‘+Add Users’.
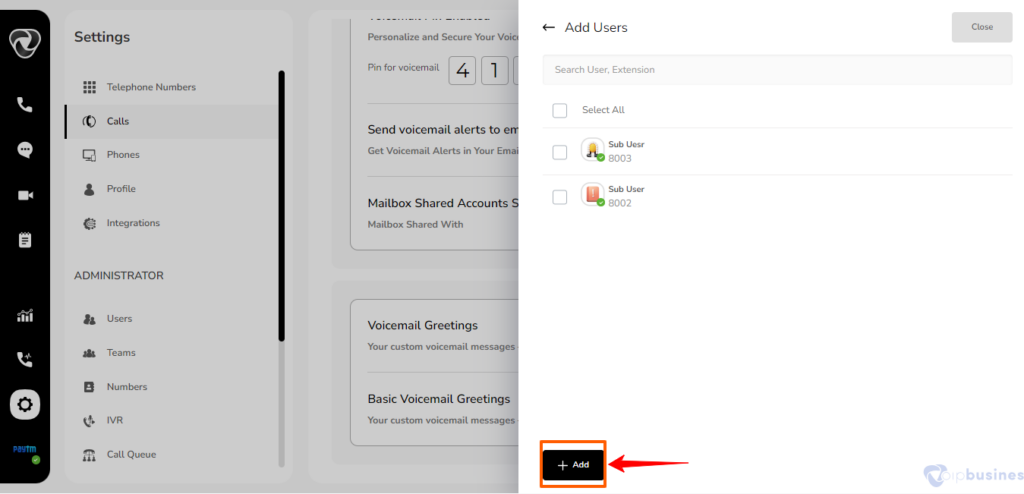
- Add users by clicking the ‘Add’ button there.
How to set up Personalized Greetings?
In VoIP Business, a user can also use voicemail from SIP using these codes.
Dial Short Cods:
- Dial *123* to access your voicemail box.
- Dial *10* to set a busy voicemail greeting.
- Dial *11*to set an unavailable voicemail greeting.
- Dial *12* to set a temporary voicemail greeting.
- Dial *13* to set a greeting voicemail greeting.
- Dial *14* to remove voicemail busy messages.
- Dial *15* to remove unavailable voicemail messages.
- Dial *16* to remove temporary voicemail messages.
- Dial *17* to remove the voicemail greeting message.
How to manage custom voicemail greetings from VoIP Business?
Setting up voicemail greetings is super simple. Follow these steps:
- Login into your VoIP Business Account and navigate to Settings.
- Click Voicemail and find the Voicemail greetings here. You can manage temporary & advanced greetings.
The following options are available to change greeting sound files.
- Record a new sound file.
- Upload a sound file.
- Select a file from the sound library.
Users can also remove greetings at any time and add a new ones.