VoIP Business-Call Queue
What does the term ‘Call Queue’ means in the context of VoIP business communications?
In the dynamic landscape of business communication, VoIP Business has emerged as a game-changer, providing efficient and cost-effective solutions. along with a vast range of features VoIP Business offers, the call queue stands out as a crucial tool for managing inbound calls and ensuring a seamless customer experience.
Understanding Call Queues in VoIP Business
Efficient Call Handling
- In VoIP Business, call queues serve as virtual waiting rooms for incoming calls.
- When the number of incoming calls surpasses the available agents, the call queue system intelligently organizes and manages the calls, preventing chaos and ensuring a systematic approach to customer service.
Orderly Waiting Experience
- Customers placed in a call queue experience an orderly waiting process.
- They may listen to hold music or informational messages, providing a professional touch and keeping them informed about their position in the queue.
- This organized waiting experience is crucial for customer satisfaction, as it creates a positive impression about the company’s commitment to customer service.
How Call Queues Operate in VoIP Business Systems
Automatic Call Distribution (ACD)
- VoIP Business systems uses Automatic Call Distribution (ACD) to intelligently route incoming calls to the appropriate call queue.
- ACD ensures fair distribution among available agents, preventing overload on specific team members while maintaining optimal efficiency.
Agent Availability Integration
- As agents become available, the call queue system dynamically routes the next call to an open agent.
- This integration optimizes resources, reduces wait times, and maximizes agent productivity.
Configurable Settings for Customization
- VoIP Business solutions offer configurable settings for call queues, allowing businesses to tailor the system to their specific needs.
- Customization options include setting maximum queue sizes, defining maximum wait times, and establishing routing rules based on various criteria.
Benefits of Call Queues in VoIP Business Environments
Enhanced Customer Experience
- Call queues contribute significantly to enhancing the overall customer experience.
- By providing a structured waiting experience and minimizing wait times, businesses can build positive relationships with their customers.
Optimized Workflows
- For businesses dealing with high call volumes, call queues optimize workflows by efficiently managing incoming calls.
- It ensures that every call is addressed promptly and that no customer is left unattended.
Professionalism and Brand Image
- The use of call queues adds a layer of professionalism to a business’s communication strategy.
- It showcases a commitment to provide quality customer service, which can positively impact the brand image.
How to create Call Queue?
To initiate the process of incorporating a Call Queue, it is imperative to follow procedural steps given below:
- Start by logging into your VoIP Business account, utilizing your valid credentials.
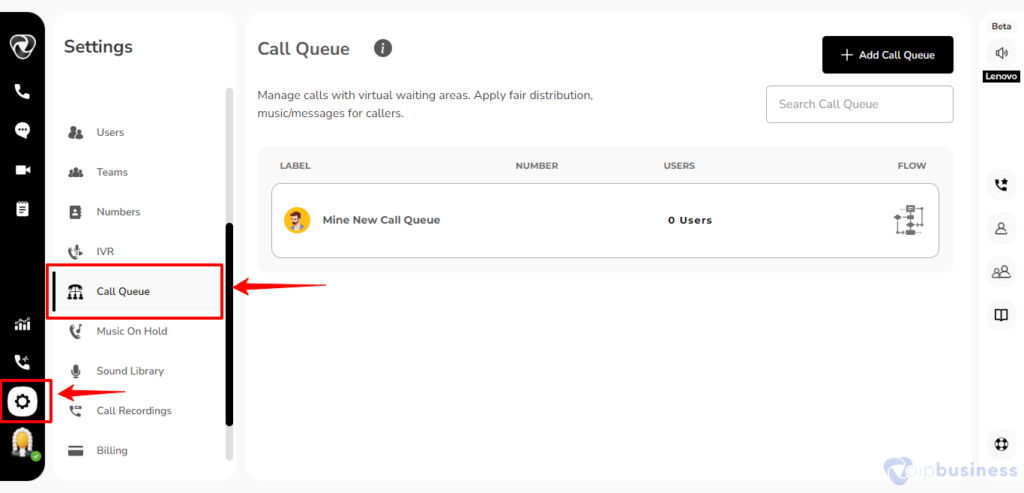
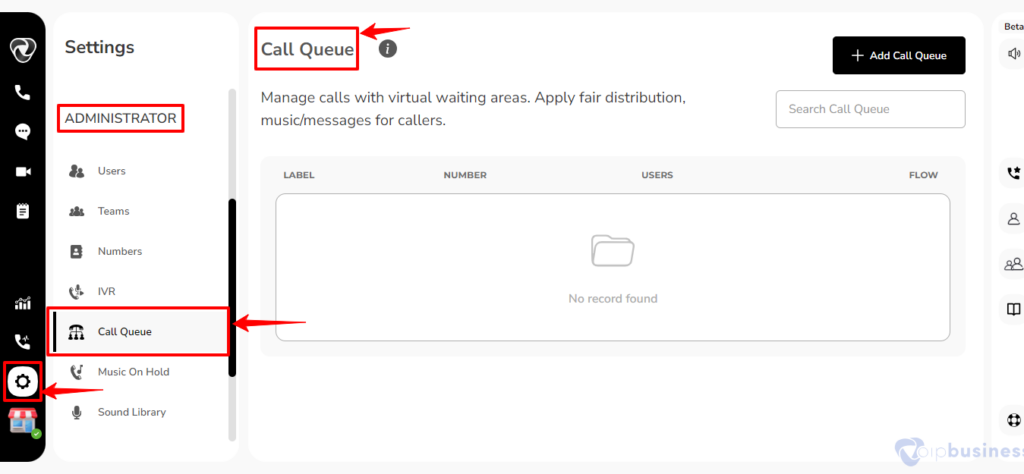
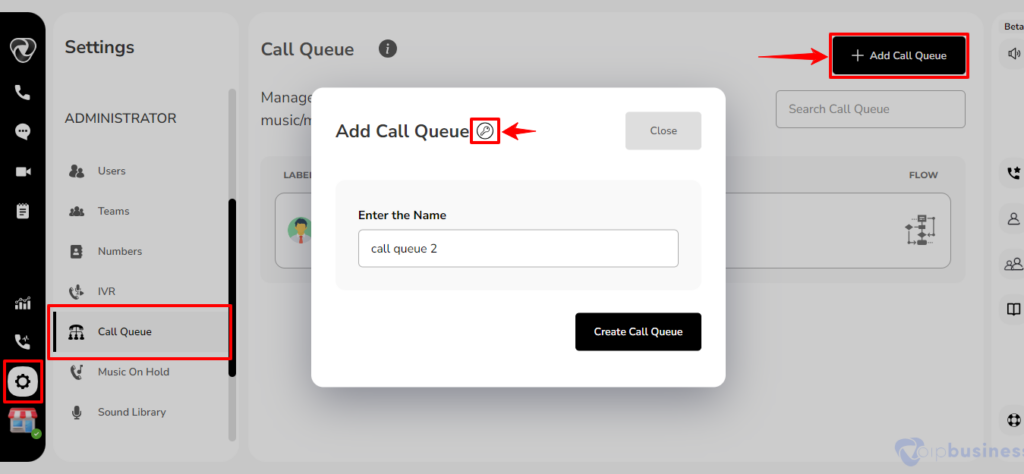
- Navigate to the “Settings” icon positioned at the left-bottom sidebar.
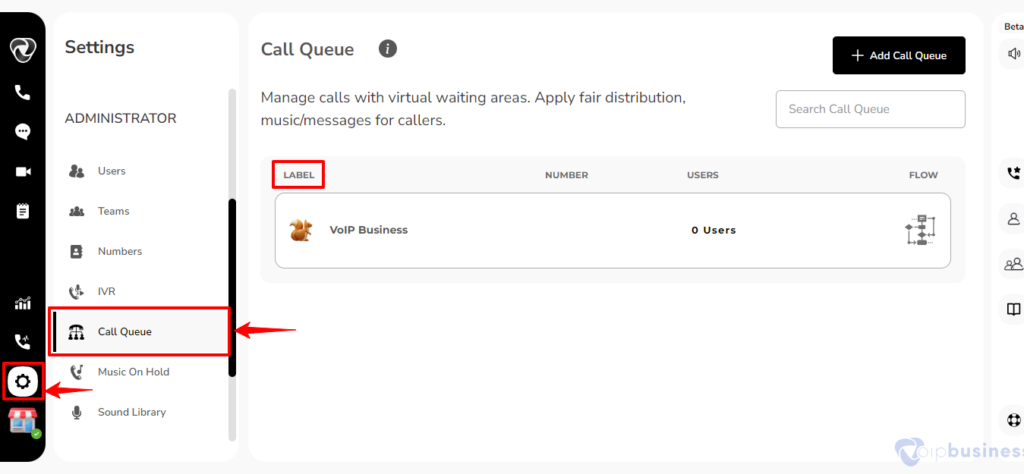
- Within the administrator settings, locate and select “Call Queue”.
- Explore the call queue module within this section.
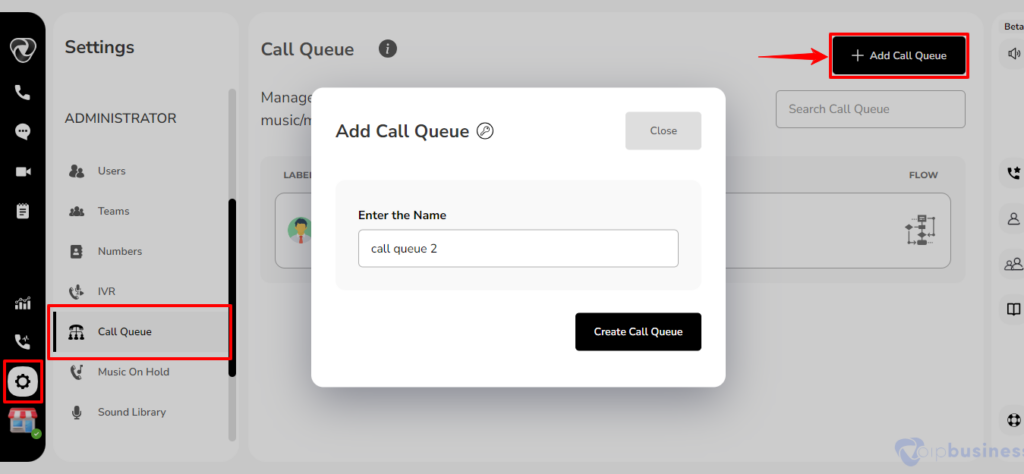
- Initiate the addition of a new call queue by selecting the “+Add Call Queue” button, prompting a pop-up window to appear on your interface.
- There you can write your call queue name before adding. Then press “Create Call Queue” button.
- Access a detailed breakdown of the available slots within your current plan by selecting the small icon adjacent to the Call Queue label.
- A new interface will manifest on the right side of your screen.
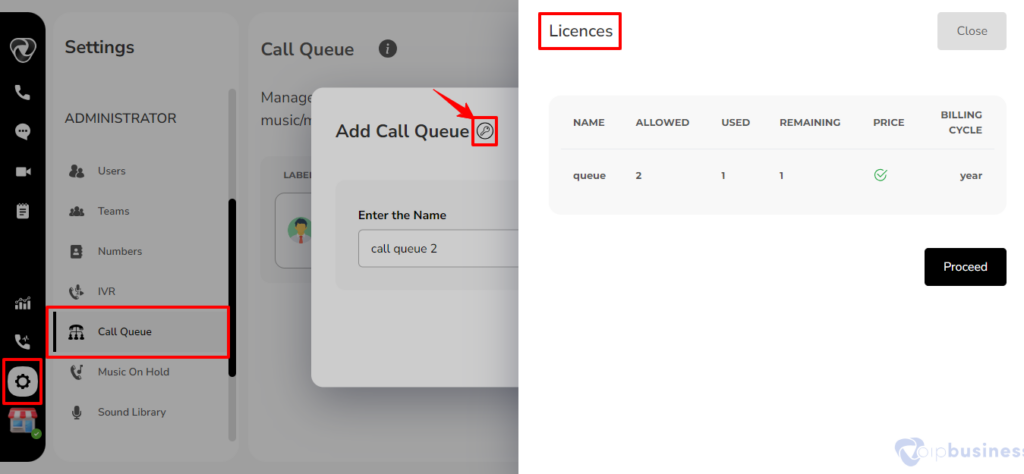
- You may initiate the addition of a call queue by selecting the ‘Proceed’ button located at this juncture.
VoIP Business- Edit Call Queue
How to edit the name of a call queue and update its profile within a VoIP business system?
To update the name and profile of a call queue, please adhere to the following below steps:
- Access your VoIP Business account and click on the settings icon located in the left-bottom sidebar.
- Proceed to the administrator settings and select ‘Call Queue’.
- Choose the specific call queue from the interface that you wish to modify.
- A new interface will be presented on the right side of the screen, allowing you to update the name of the selected call queue efficiently.
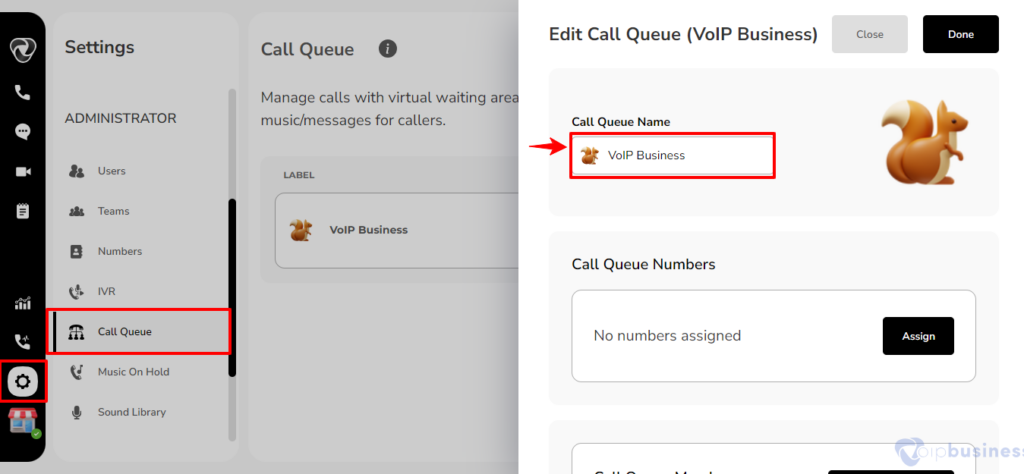
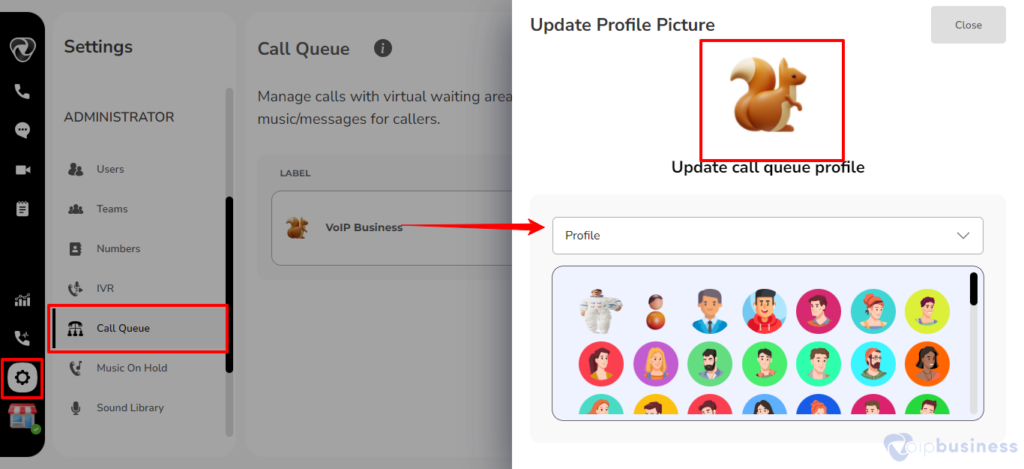
- You have the option to update the profile for your call queue by selecting the corresponding option located on the right side of the call queue name.
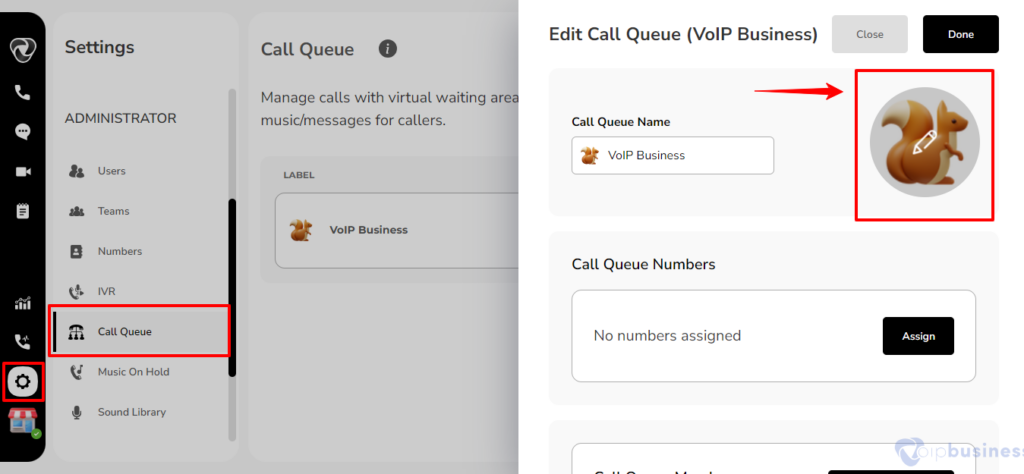
- Upon clicking, a new popup interface will appear on the right side of your screen, providing access to further options.
What is the process for assigning a number to a call queue in a VoIP Business?
To assign a number to a Call Queue, please follow the steps below:
- Access your VoIP Business account, and on the left-bottom sidebar, click on the ‘Settings’ icon.
- Navigate to the ‘Numbers’ section within the administrator settings and select it.
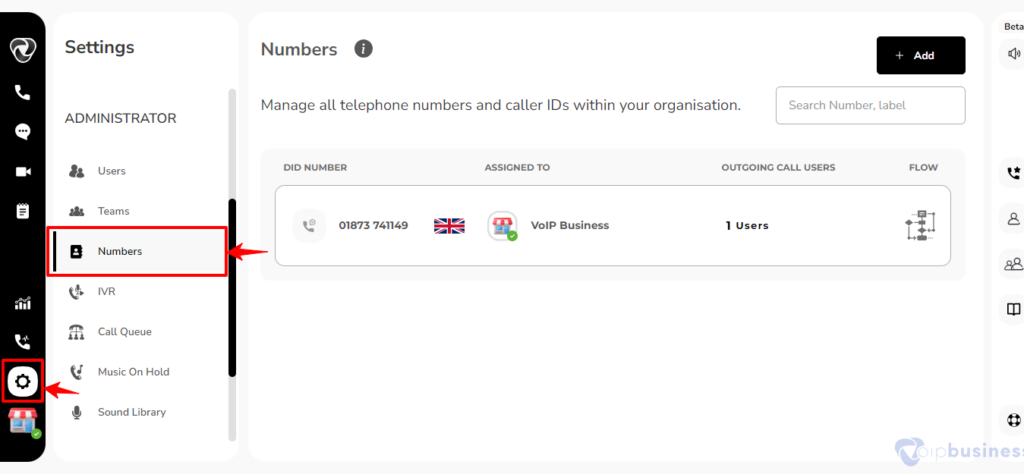
- Select the ‘Assign to’ label corresponding to the desired number, and a new popup interface will promptly appear on your screen.
- Then click on “Change” button for incoming calls.
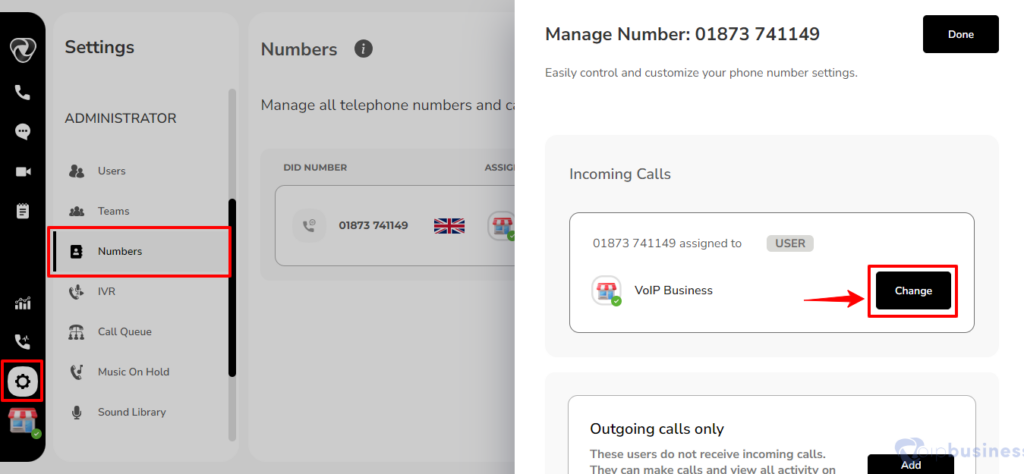
- Subsequently, choose the ‘Call Queue’ option to proceed with the assignment of the selected number to the designated call queue.
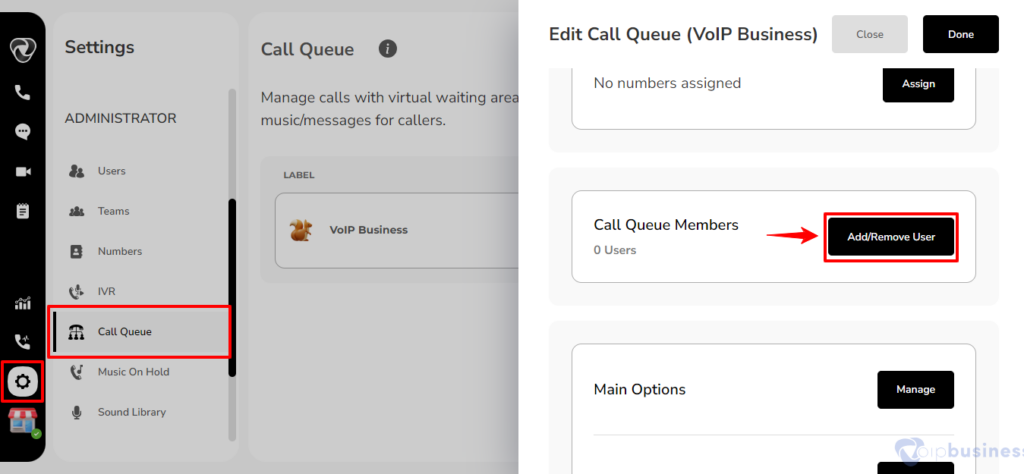
How Can you add members to a Call Queue within a VoIP Business?
To add members to a call queue, follow these steps:
- Log into your VoIP Business account and click on the settings icon located in the left-bottom sidebar.
- Proceed to the administrator settings and select ‘Call Queue’.
- Choose the specific call queue from the interface that you wish to modify.
- A new interface will appear on the right side of the screen.
- Scroll down to the ‘Add Members’ section, and click on the ‘+ Add Members’ button to seamlessly incorporate new members into the call queue.

What is the process for deleting a Call Queue in a VoIP Business?
To delete a Call Queue, adhere to the following steps:
- Access your VoIP Business account and click on the settings icon located in the left-bottom sidebar.
- Proceed to the administrator settings and select ‘Call Queue’.
- Choose the specific call queue from the interface that you wish to delete.
- A new interface will appear on the right side of the screen.
- Scroll down to the “Delete” button and click on it.